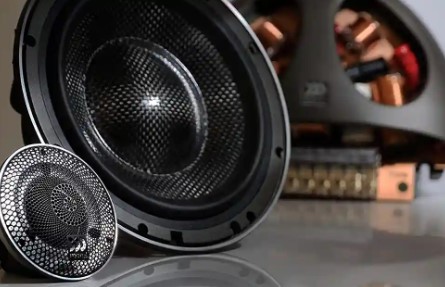
Foam surrounds are great than rubber surrounds. They have become the new fashion. However, the foam covering the speaker doesn’t endure indefinitely and begins to deteriorate after prolonged use.
In this article, we will provide detailed information to help you know how to refoam speakers? Let’s get started.
Do You Understand Speaker Foam?
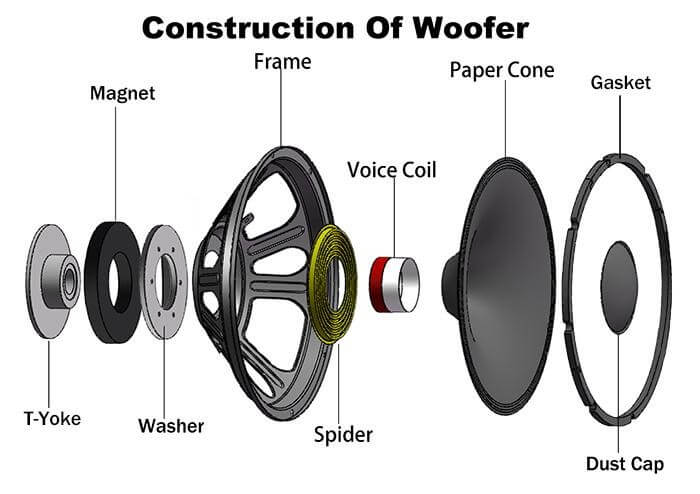
Speaker foam is a durable yet flexible substance that improves the speakers’ overall performance.
It is preeminent in speaker surrounds and cones, two crucial components of the speaker. When you know how to refoam speakers properly, your speaker performance will be better.
What Is The Purpose Of Refoam Speaker?
The speaker foam, often called the speaker dome, is crucial to the speaker’s durability and sound quality. It is made to give the speaker you are using the necessary dampening while still allowing the speaker cone to move freely.
The sound waves result from this movement, transforming electrical signals into audible noises. Lack of adequately working speaker foam can cause good quality to decline and cause distorted or muted sound. Consequently, the sound quality will not satisfy your needs.
How To Refoam Speakers?
It organizes the workspace, which is necessary for finishing the refoaming procedure quickly and efficiently.:
Step 1: Prepare the materials and tools
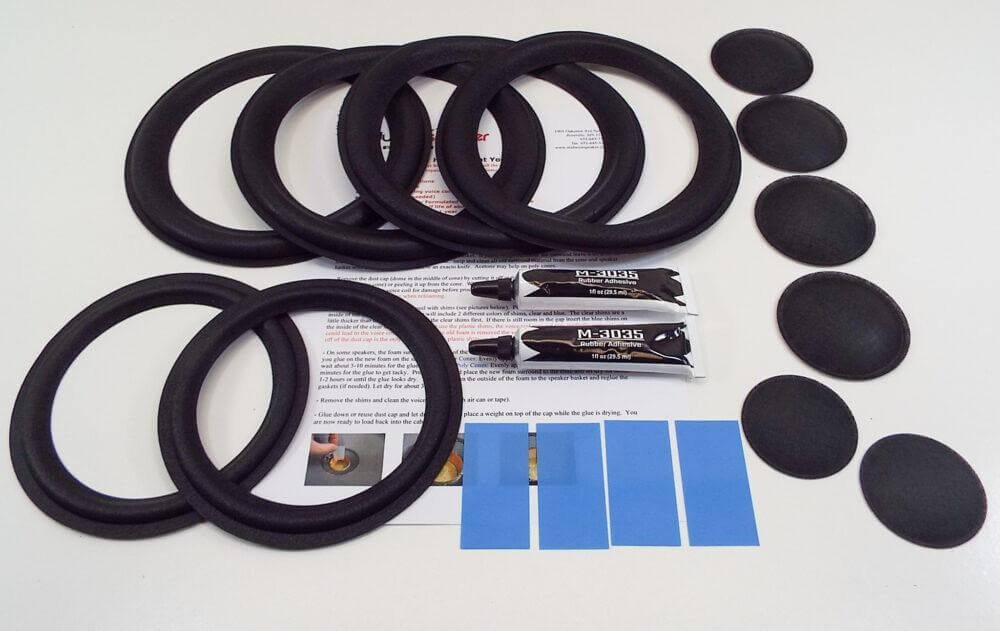
Initially, gather all of the required supplies and equipment. You will need a utility knife, rubbing alcohol, adhesive, and a foam speaker repair kit compatible with your speaker model.
Step 2: Set up your workspace
Make sure your workspace is tidy and uncluttered. It is easier to oversee the operation, and there is less chance of losing small speaker pieces when there is enough room.
Step 3: Remove the speaker from the cabinet
After unscrewing the speaker from the cabinet, carefully disconnect the attached wires. Remember to make sure to do it safely and with the correct technique.
Step 4: Disassemble the gasket
The washer is the ring that seals the speaker cone to the enclosure. All you need to do is carefully pry it open with the utility knife, ensuring not to damage it.
Step 5: Clean the speaker cabinets
Use a cloth and rubbing alcohol to clean the speaker cabinets. You need to remove any remaining debris or old adhesive.
Step 6: Remove and clean the old foam
The old foam must be removed carefully to prevent harm to the speaker’s other components. You’ll need a utility knife or another cutting tool for this technique.
There is a note that while removing old foam, you should treat the speaker cone and frame carefully, as these parts are pretty fragile.
Read more: Component Vs Coaxial Speakers
Step 7: Removing your dust caps and beauty ring
Start by lightly cutting the edge of the dust cover with a knife. Be careful not to cut too deep or risk damaging the speaker cone. Once the dust cap has been traced, gently peel it off with a small flathead screwdriver.
This can be done by gently pushing upwards with the screwdriver tip inserted under the edge of the dust cover.
You can carefully lift the dust cap out of the cone with tweezers when the dust cap is loose. Similarly, after the beauty ring comes loose, carefully lift it from the speaker and keep it safe to reattach later.
Step 8: Attaching the dust caps and the gasket
First, you will need the dust cover that you removed earlier and the adhesive. Make sure the adhesive you are using is suitable for the speaker.
Next, apply a thin, even layer of glue to the underside of the dust cap around the edge. Be careful not to use too much, negatively affecting the speaker’s performance.
Then, carefully align the dust cap on the hole in the cone’s center, ensuring it’s in place. Then, gently press down on the lid, ensuring the adhesive adheres to the speaker cone. Remember to wipe off any excess glue that may seep out.
Finally, let the glue dry: Drying time can vary depending on the adhesive used, so refer to the manufacturer’s instructions. The same goes for the gasket.
Read more: How to Daisy Chain Speakers
Step 9: Attaching the new foam
First, you apply the adhesive to the speaker cone: you need to apply a thin, even layer of glue to the outer edge of the cone, where the new foam will adhere. Use your brush or applicator to spread evenly.
You then carefully place the new foam rim into the speaker cone, making sure it’s aligned correctly. The inner edge of the sponge should be flush with the edge of the speaker cone.
Next, you press the foam onto the cone, gently encouraging good contact. Make sure not to press too hard or deform the foam.
Next, apply a layer of glue to the speaker frame where the outer edge of the new sponge will attach.
Finally, you need to attach the foam to the frame. You have to lift the outer edge of the foam pad and press it down on the glue on the shelf. Make sure the foam is flat and evenly applied all around.
Step 10: Reconnect your speakers
After completing the process, to use the speaker, you just need to reconnect it to the speaker as usual.
What Are The Tips For Refoam Speakers?
Here are some tips to help you refoam speaker:
Use the right adhesive
Using a suitable adhesive is very important for your speakers. So you need to choose the suitable glue for each type of speaker and follow the expert’s instructions.
Working in a clean environment
Ensure your workspace is clean to prevent dust or particles from entering the speaker components. And remember to let the speaker dry before proceeding to the next steps.
Speaker cone protection
You must be very careful when working around the speaker cone, which is often a fragile part that can be easily damaged.
Handle with care
Always remember that speakers, especially vintage speakers, can be pretty subtle. Handle each part carefully to avoid causing any damage.
Read more: How To Reset Bluetooth Speakers
Conclusion
Refoaming a speaker is a rewarding process. It extends your speakers’ life and revives the sound quality. You should remember the key to a successful refoaming process lies in being patient, using suitable materials, and working methodically.
After reading the above article, ensure you know how to refoam speakers correctly and quickly.
FAQs